Tuesday, 31 October 2023

{How to} Prevent duplicate emails to contacts that share an email address on Dynamics 365 Marketing

Hello Everyone,


Today i am going to show how to prevent duplicate emails to contact that share an email address in Dynamics 365 Marketing.


Let's get's started.


Normally in CRM there are duplicate emails in the contacts and even sending emails to these contacts will be alot of duplication of email communication with them.


How do we enable email deduplication on Dynamics 365 Marketing?


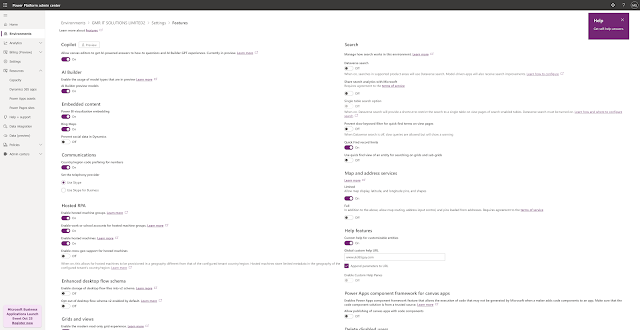
1. Go to settings and select Features switches.


2. Enable the Email deduplication feature toggle in the "Email Sending" section.


Effective email management is very crucial for maintaining strong customer relationships and ensuring your business's success.


So enabling email deduplication, you can ensure that even if your data has multiple contacts with the same email address.


When you send an email to the customers it will be sent only once, keeping their inboxes clutter-free and preserving your brand reputation.


By identifying and consolidating duplicate contacts that share the same email address, email deduplication ensures that each customer receives your message just once.


Increasing the chances that your important messages reach their inboxes and avoiding spam folders.


That's it for today.


 I hope this helps.

Malla Reddy Gurram(@UK365GUY)
#365BlogPostsin365Days


Monday, 30 October 2023

What is the impact of Business Unit scoping on Dynamics 365 Customer Insights

Hello Everyone,


Today I am going to share what is the impact of Business Unit Scoping when you turn on Business Unit Scoping.


Let's get's started.


Login into Dynamics 365 Customer Insights.


Change to settings on the bottom left hand cornor.


Click on Feature Settings:


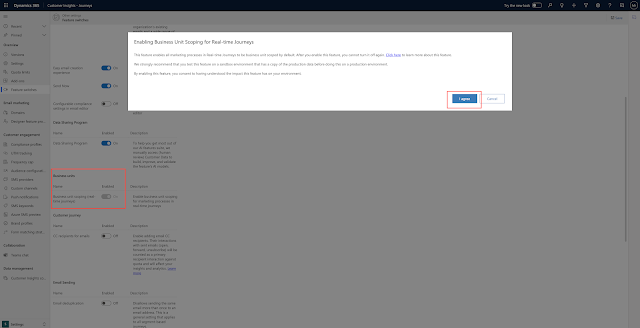
Business unit scoping turn ON.


Enabling Business Unit Scoping for Real Time Journeys:


This feature enables all marketing processes in RTM Journeys to be business unit scoped by default. You cannot turn it off once again.


Strongly recommend that you test this feature on a sandbox environment that has a copy of the production data before doing this on a production environment.


By enabling this feature, you consent to having understood the impact this feature has on your environment.


That's it for today.


I hope this helps.
Malla Reddy Gurram(@UK365GUY)
#365BlogPostsin365Days


Sunday, 29 October 2023

Turn on UTM Tracking on Dynamics 365 Customer Insights

Hello Everyone,


Today i am going to show what will be added to your emails when you Turn On UTM Codes in Dynamics 365 Customer Insights.


Let's get's started.


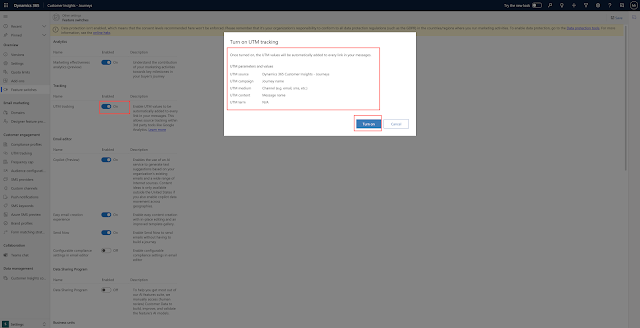
When you turn ON - Feature Settings.


UTM Tracking:


Once UTM Tracking is TURN ON:

The UTM Values will be automatically added to every link in your messages.


UTM parameters and values:


UTM Source : Dynamics 365 Customer Insights - Journeys
UTM Campaign - Journey name.
UTM Medium  - Channel(e.g email, sms, etc)
UTM content:  Message name.
UTM term: N/A


That's it for today.


I hope this helps.


Malla Reddy Gurram(@UK365GUY)
#365BlogPostsin365Days


Saturday, 28 October 2023

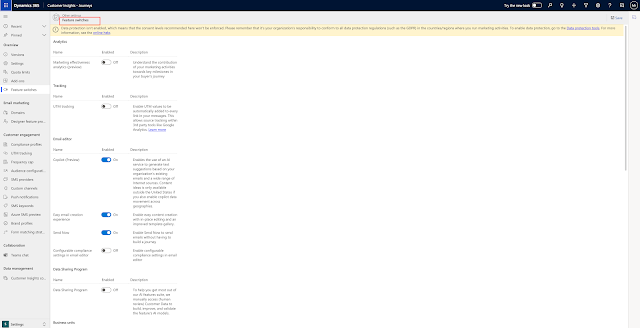
Features switches Settings on Dynamics 365 Customer Insights

Hello Everyone,


Today I am going to show what are the settings on  features switches included on Dynamics 365 Customer Insights.


Let's get's started.


Login into Dynamics 365 Customer insights.


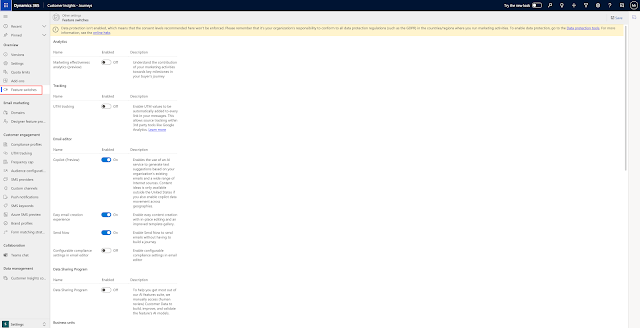
Change to settings on left hand side cornor of the screen.


Click on Feature Switches.


Let's look at each of the settings what they does in terms of functionality in Dynamics 365 Customer Insights.


Analytics:


1. Marketing effectiveness analytics(Preview) turning ON this will give information about the contribution of your marketing activities towards key milestones in your buyer's journey.


Tracking:


UTM tracking: Turn ON this settings will enable UTM Values to be automatically added to every link in your messages. This allows source tracking within 3rd party tools like Google Analytics.


Email editor:


Copilot(Preview) Turn ON this settings will enable to use of an AI service to generate text suggestions based on your organizations existing emails and a wide range of internet sources. Content ideas is only available outside the United States if you also enable copilot data movement across geographies.


Easy email creation experience - Turn ON enable easy content creation with in place editing and an improved template gallery.


Send Now - Turn ON -enable SEND NOW to send emails without having to build a journey.


Configurable Compliance settings in email editor - Turn ON - enable configurable compliance settings in email editor.


Data Sharing Program:


Turn ON this settings helps to get most out of our AI features suites, we manually access(HUMAN REVIEW) Customer data to build, improve, and validate the feature's AI models.


Business Units:


Business unit scoping (real-time journeys) Turn ON enable business unit scoping for marketing processes in real time journeys.


Customer Journeys:


CC recipients for emails: Turn ON enable adding email CC recipients, Their interactions with sent emails (Open, farward, unsubscribe) will be counted as a primary recipient interaction against quota and will affect your insights an analytics.


Email Sending:


Email deduplication - Turn ON - Disallows sending the same email more than once to an email address. This is a general setting that applies to all segment - based Journeys.


Journeys:


Lead and Opportunity creation(Preview) - Turn ON will enables the creation of leads and opportunity within journeys using built-in journeys activities.


Integrations:


Customer Voice Integration: Turn ON - will enable Dynamics 365 Customer Voice Integrations with Marketing.


Compliance:

Multi brand consent and customizable preference centers - Turn ON - will create customizable branded preference centers in real -time journeys that manage consent separately for each line of business. 


Note: You can not disable this feature once it is enabled.


Lead Management:


Lead Scoring - Turn ON will create scoring model to identify the best leads.


That's it for today.


I hope this helps,


Malla Reddy Gurram(@UK365GUY)
#365BlogPostsin365Days


Friday, 27 October 2023

{How to} Turn on Features on Dynamics 365 Customer Insights

Hello Everyone,


Today i am going to show how to turn on new features and existing features on Dynamics 365 Customer Insights.


Let's get's started.


Login into Dynamics 365 Customer Insights.


Change to Settings on the bottom left hand cornor.


Then click on Version and you will see turn on features, click on it.


Then after few minutes new feature settings will be displayed, then the settings will be displayed.


I will show more about these settings in next blog post.


Until then KEEP READING my other blog posts.


Thank you for your all support.


That's it for today.


I hope this helps

Malla Reddy Gurram(@UK365GUY)
#365BlogPostsin365Days


Thursday, 26 October 2023

{How to} check Dynamics 365 Customer Insights Version status

Hello Everyone,


Today i am going to show how to check version of Dynamics 365 Customer Insights.


Let's get's started.


1. Login into Dynamics 365 Customer Insights.


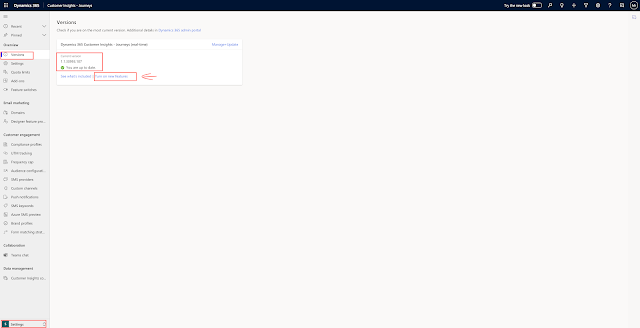
2. Change to Settings.


3. Click on the Version.


Then you can see the version and its status.


You can check the status of the version from power platform admin center too.


That's it for today.


I hope this helps.

Malla Reddy Gurram(@UK365GUY)
#365BlogPostsin365Days


Wednesday, 25 October 2023

{How to } Install Power Platform Environment Settings App on Power Platform Admin Center

Hello Everyone,


Today I am going to show how to manage feature settings on Power Platform Admin Center.


Let's get's started.


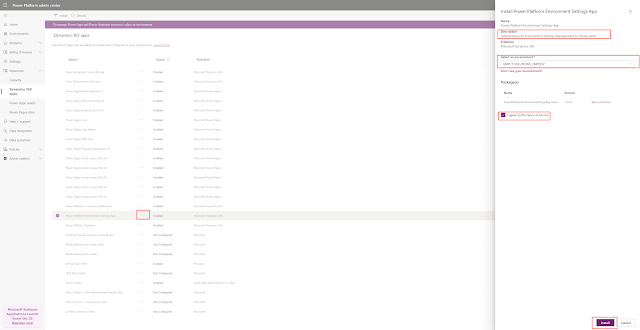
Login into www.admin.powerplatform.microsoft.com


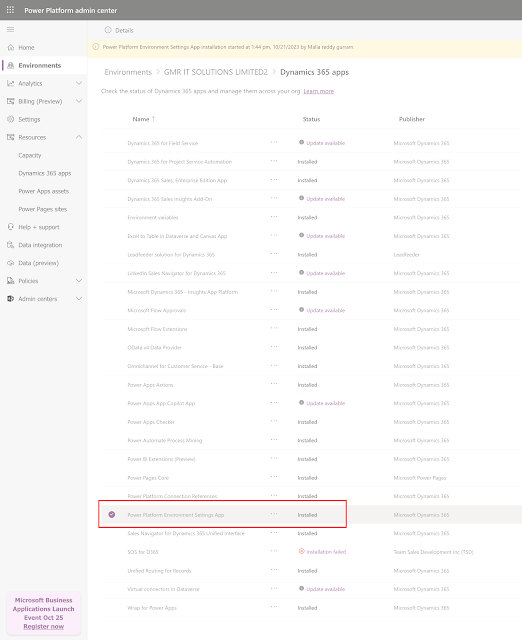
Expand Resources > Dynamics 365 App and look for Power Platform Environment Settings App.


Click on "..." and install 


Choose the environment you want these settings effect and accept terms and conditions.


Now you can check the Settings > Features > All settings will be here.


That's it for today.


I hope this helps.
Malla Reddy Gurram(@UK365GUY)
#365BlogPostsin365Days

Tuesday, 24 October 2023

Send alphanumeric SMS senders from Dynamics 365 Marketing

Hello Everyone,


Today I am going to share how to send alphanumeric SMS senders to increase engagement.


Let's get's started.


Now you can send alphanumeric senders, you can now send one way text messages to your customers using a custom string of letters or numbers, making it easier for customers to recognize that messages are from a trusted source.


By using brand or company name, you gain brand awareness, increase trust and ultimately boost the overall effectiveness of your SMS marketing efforts.


That's it for today.


I hope this helps.
Malla Reddy Gurram(@UK365GUY)
#365BlogPostsin365Days


Monday, 23 October 2023

Send text messages using Vibes on Microsoft Dynamics 365 Marketing

Hello Everyone,


Today I am going to show how to send text messages from Microsoft Dynamics 365 Markerting using Vibes Account.


Let's get's started.


Suppose business want to connect to existing customers through text messages. You can use your Vibes account to do all real time marketing to send text messages to maximize customer engagement.


We can leverage existing Out of the box funtionalities such as personalization, templates, and analytics to unlock the potential of vibes.


Features:


  • Connect your existing Vibes Account and add the phone numbers you're already using.
  • Create message using the Dynamics 365 Customer Insights - Journeys ( former Dynamics 365 Marketing) text message editor.
  • You can build and optimize customer journeys using the full suite of text message including personalization, two-way communication, interactions and analytics.


That's it for today.


I hope this helps.
Malla Reddy Gurram(@UK365GUY)
#365BlogPostsin365days

Sunday, 22 October 2023

{How to} Use Copilot in Dynamics 365 Sales Hub

Hello Everyone,


Today I am going to show to use Copilot on Dynamics 365 Sales Hub.


Let's get's started.


Before we start if you want to know how to enable Copilot in your Dynamics 365 Sales Hub please read my blog post below:


Now we can see the Copilot in Sales Hub in action.


Login into Dynamics 365 Sales Hub.


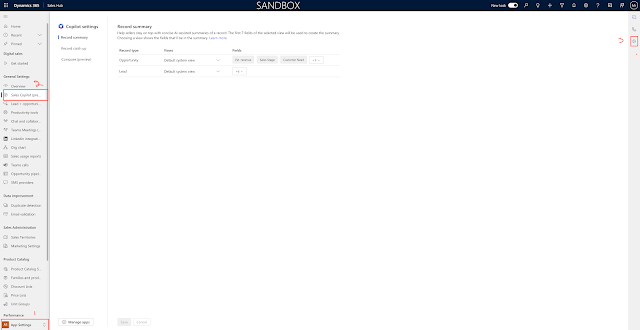
Change the settings to App Settings and the click on Sales Copilot(Preview) and click on Copilot Symbol on the right hand side of the screen.


A side window will be populated, here you can ask questions related to your SALES TABLES.


All set now you can use Copilot on Dynamics 365 Sales Hub.


That's it for today.


I hope this helps.

Malla Reddy Gurram(@UK365GUY)
#365BlogPostsin365Days


Saturday, 21 October 2023

{Did you know} Now you can export the power page sites website inventroy data for tenants and environments

Hello Everyone,


Today i am going to share how you can export website inventory data for tenant and environments.


Let's get's started,


Suppose your organisation is highly regulated industries and government spaces, need to have an accurate inventory of all websites in their tenant. This will help organization, who can access them, when they last modified.


Let's see in action.


Login into Power Platform Admin Center (www.admin.powerplatform.microsoft.com)


Click on Resources and then click on Power Pages Sites:


Then select the Power Pages site to export and click on "EXPORT CSV".


Currently the Power Platform admin Center provides a read only list of all websites in a tenant(or environments to which the user is an admin) that can't be exported for further analysis. 


The following list as metadata:


  • Name
  • Status
  • Environment
  • Created on
  • Type
  • Site Visibility


This new feature provides the following:


  • Additional webiste metadata like last modified time, last modified by, and when the site was made public.
  • Admins can export this data to a CSV and access the additional metadata through admin APIs.


That's it for today.


I hope this helps.


Malla Reddy Gurram(@UK365GUY)]
#365BlogPostsin365Days


Friday, 20 October 2023

{Did you know} Power Pages Makers can use developer environment to try different templates when they first login into Power Platform admin center

Hello Everyone,


Today I am going to share power pages makers can use developer environment instead of using Dataverse and try different templates.


Lets get's started.


Suppose in your organisation some power pages makers wants to try Power Pages and before they actually bind to the power pages licenses, they can try the development environment and use different power page templates.


How do you do that?


They will be given an opportunity to use a Power Platform developer environment with several Power Page Templates pre-installed to allow users to create a website for learning and development purposes.


Having a developer environment will remove the need to create a Microsoft Dataverse environment before trying Power Pages.


That's it for today.


I hope this helps.


Malla Reddy Gurram(@UK365GUY)
#365BlogPostsin365Days


Thursday, 19 October 2023

{ How to} Add cloud flows with Power Pages

Hello Everyone,


Today i am going to show how you can use Power Automate Flows from Power Pages.


Let's get's started.


Login into Power Pages; www.make.powerpages.microsoft.com


Click on the Solutions.


You can create a new solution or existing solution


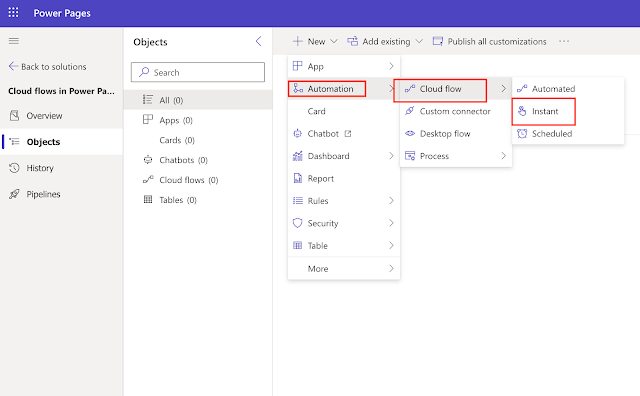
You can select the +New, Automation, Cloud Flows and then Instant flow.


You will get a new window and Select Skip.


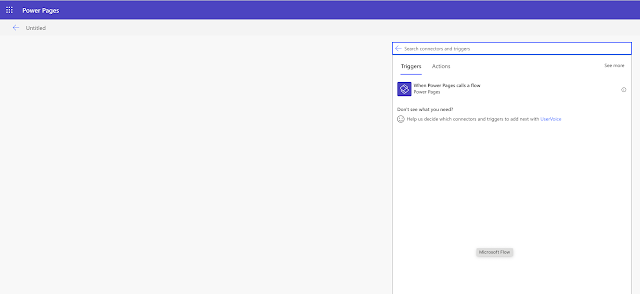
Then search for Power Pages select when Power Pages calls a flow trigger


Define your flow steps and return values and select save.


That's it for today.


I hope this helps.


Malla Reddy Gurram(@UK365GUY)
#365BlogPostsin365Days


Wednesday, 18 October 2023

{How to} set opportunity pipeline view in Dynamics 365 Sales Hub

Hello Everyone,


Today I am going to show how to set Opportunity Pipeline View in Dynamics 365 Sales Hub.


Login into Dynamics 365 Sales Hub.


Click on Opportunity Pipeline and you will get the Opportunity pipeline view.


Opportunity Pipeline view: 


Empower your team by helping them keep track of their opprotunities with a comprehensive view of their deal landscape and a collection of productivity tools.


You can set the default form for side panel as it show up in the side panel, Adminstrators can set a default form for the side panel,but sellers can still choose between other forms within the side panel as required.


Opportunity, Field Service Information, AI for Sales, LinkedIn Integration, SOS, Opportunity Project Information.


Set default metrics for sellers:


Customise metrics and set as default, with this capability admins can define a new metric or modify an existing one and make it default on the pipeline view for everyone, However, seller retain the ability to modify metrics according to their individual requirements.


Mange charts : charts to include and customize the settings.

Deal trackers, Sales Funnel.


Publish all the settings.


That's it for today.


I hope this helps.

Malla Reddy Gurram(@UK365GUY)
#365BlogPostsin365Days


Tuesday, 17 October 2023

Real Time Marketing in Dynamics 365 Customer Insights

Hello Everyone, 


Today i am going to share the benefits of Real Time Marketing (RTM) in Dynamics 365 Customer Insights Marketing.


Let's get's started.


Do you know Microsoft has introduced RTM to replace Outbound Marketing going farward.


First let's see Outbound Marketing (OBM)


Outbound marketing is used for segment based journeys, where you can communicate with customers in groups.


These are the features of include:

1. Email marketing

2. Customer Journeys

3. Lead Scoring

4. Marketing forms and landing pages

5. Social posting


As Microsoft announced from from September 1st 2023, Dynamics 365 Marketing will be combined with Dynamics 365 Customer Insights to form a single Product called Dynamics 365 Customer Insights.


Capabilities of RTM:


Most of Outbound Marketing Capabilites are available on Real Time Marketing, Also new module offer features that are not available in OBM.


1. Trigger based customer journeys:


You can enrol prospects in an RTM journeys based on certain triggers, For instance these can be interactionss like an email open and clicks, updates to Dynamics 365 fields.(e.g initiating a nuture journeys when an opportunity becomes inactive), or custom triggers tailored to your preferences.


This ability to personalise marketing communications one-to-one is what differentiates RTM from OBM.it's not just restricted to emails.


You can engage with customers across multiple channels, including SMS, push notifications and custom channels like Whatsapp.


2. Target Leads: You can target leads using RTM, before only contact records used in segment.


3. New Segment builder: The new segment builder is more user friendly, featuring a drag and drop interface that let's you search for attributes without knowing cpmplex data structures.


You can also create segments by simply typing your targets criteria using natural languag, it is available on OBM too.


4. Personalise messages using dynamic and conditional content:


This isn't new and outbound marketing also offers this capability.But what sets its apart for RTM is how easily this can be done without making code changes.


Additional content is your communications, including different images, button and links that reflect the recipient's interests, demographics or geographics information, using the data tracked in Dynamics.


5. AI-Powered optimisation: Copilot in Dynamics 365 Marketing brings advanced AI capabilities into the application.


e.g: you can quickly create email content with copilot assistance.


You can describe the key messaging points of an email. and copilot will generate different content suggestions for you in seconds, consistent with your previous message regarding brand, style and structure.


You can quickly create a draft email and tweak accordingly further enhancement.


6. Create Journeys using natural language: In release wave2 2023 Copilot feature is announced.

Which allows marketers to use natural language to create customer journeys.

You can describe journeys using everyday words and generative AI will build it.


You can also create journeys using out of box templates for frequent scenarios such as form submissions and post event follow ups .


7. Quiet times: Copilot will also introduce settings to control days or times when customers shouldn't receive marketing messages. You can use quiet times to prevent emails. texts and notifications from being delievered during evenings, weekednds and holidays.


8. Advanced Analytics: You can get marketing campaigns, channels, content, journeys, with real time marketing dashboards and insights.


9. UTM Codes: Codes are automatically added to all URL's in your emails. UTM Markers allows to easily track and report which source website, campaign and content  led customers to your site. With click in RTM, the campaign name, medium and source will be seamlessly added saving your time.


Consent centre: With Outbound Marketing consent is managed at the contact record level, In RTM this is stored per email address or phone number.


RTM offers a preferenc centre for users to update consent, but it has limited customisation and branding options compared to the subscription centre in outbound marketing.


Unlike OBM, RTM cannot manage subscriptions selectively, you receive all communications or none with no options to select specific subscriptions.


There is a workaround you can continue using the outbound subscription centre in real time marketing until the preference centre fully evolves.


10. Message frequency cap:  

This allows you to limit the number of messages sent to your audience to avoid message fatigue. Set daily, weekly or monthly limit for email and other channels and journeys to minimise churn.


11. Advanced Journeys creation experience:


Creating and managing journeys in RTM has been significantly improved with new features that include.

You can add more than 2 branched to a step, eliminating the need for complex nested branches.

Edit live journeys without pausing or stopping them.

Assign phone calls without pausing or stopping them.

Assign phone calls and tasks to sales teams or trigger sales sequences from within a marketing journeys to easily hand off leads to sellers.

Simplified reminder journeys that nudge customers to complete a certain action within a defined period.


That's it for today.


I hope this helps


Malla Reddy Gurram(@UK365GUY)

#365BlogPostsin365Days


Monday, 16 October 2023

{How to} Turn off the Copilot on Dynamics 365 Sales Hub

Hello Everyone,


Today I am going to share how to turn off the Sales Copilot feature which is updated in release wave 2 oct 2023 on Dynamics 365 Sales Hub.


Let's get's started.


Recent release of wave 2 October 2023 - Sales Copilot.


Firstly what is the use of Sales Copilot?


When you enable Copilot on apps that your sales team uses and grant them access, so sellers can use Copilot to summarize records catch up on updates prepare for any upcoming meetings etc...


In order to have this feature you need two things:


1. Sales Enterprise License or Sales Premium 
2. System Administrator privileges.


If you want to disable this feature in your organisation then you need know one condition.


Copilot can only enabled through Sales Hub App, suppose if you have custom app  and you want to enable Copilot then you need to switch to Sales Hub and Enable it.


How do you do that?


1. Login into Sales Hub.


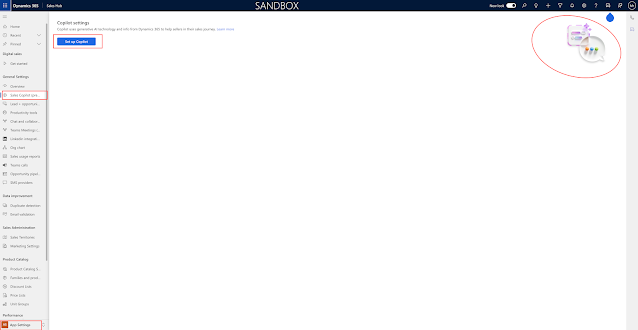
2. Change to App Settings 


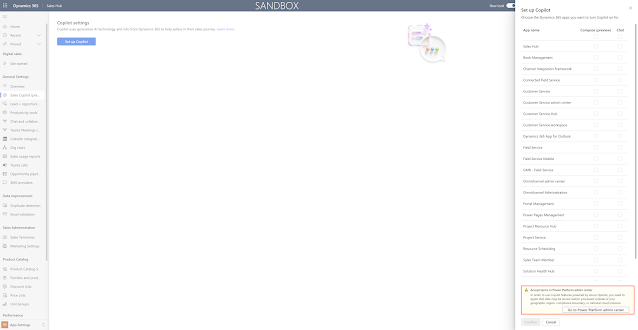
3. Under the General Settings  Select Copilot  and if you are doing this for the first time, then you need to set up copilot. 


Once you click on set up copilot then you need to accept terms and conditions from Power Platform admin center.


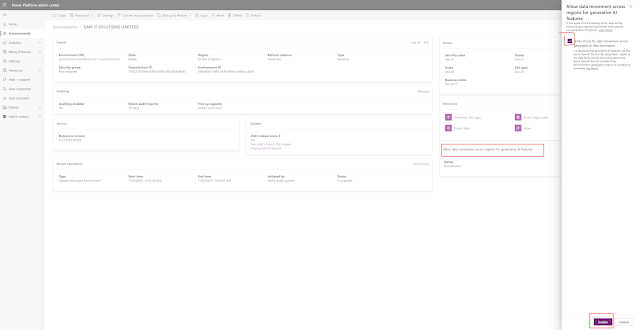
Go to PPAC and accept T&C 


Then  Allow data movement across regions for generative AI features are allowed.


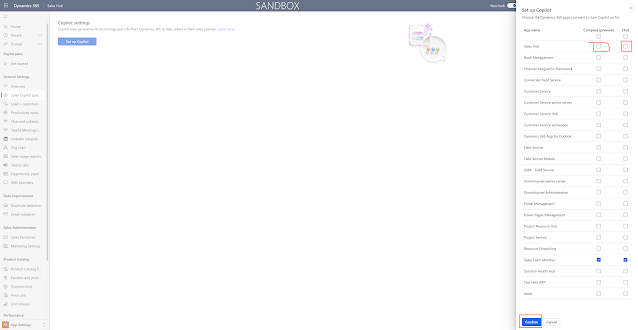
4. If you already set up then enable or disable apps or copilot features by selecting Manage Apps.


Then the Sales Copilot is  disabled on your environment.


That's it for today.


I hope this helps.

Malla Reddy Gurram(@UK365GUY)
#365BlogPostsin365Days


Sunday, 15 October 2023

{How to} turn off Try new look Oct wave 2 release feature on Dynamics 365

Hello Everyone,


Today I am going to show how to turn off "Try New Look" feature which is upgraded with OCTOBER WAVE 2 RELEASE 2023.


Let's get's started


As we know today 14/10/2023 OCT Wave 2 Released on Saas Applications - Dynamics 365 CE Environments.


One of the feature is try new look which will appear when we open the model driven app. Refer to the above screen.


When you click on try new look a new user interface will appear like below screen shot.


So if you dont want TRY NEW LOOK and  turn completely off from the screen. then follow below steps.


Create a new solution and click on add existing - others and then settings


Search for Try New  Look and do not select the "TRY NEW LOOK" (Preview) as it is for preview purpose component.


Then add the component to the solution:


After adding the component is added to the solution and publish the solution and then the TRY NEW LOOK will be disappear from the navigation pane 


Note: If you want this TRY NEW LOOK feature to turn off in other environments then deploy this solution into the other environments as managed or unmanaged according to your solution layering in your organisation.


That's it for today.


I hope this helps.

Malla Reddy(@UK365GUY)
#365BlogPostsin365Days


Saturday, 14 October 2023

{How to } Upgrade Microsoft Power Platform Wave release from Power Platform Admin Center

Hello Everyone,


Today I am going to show how to upgrade your environments manually from Power Platform Admin Center.


Let's get's started.


Microsoft Power Platform releases new features yearly twice as we all know during April and October every year.


If you want to see the upgrade features early in your environment then continue with this blog post.


Login into Power Platform Admin Center.


Select the environment and look for wave release when you scroll down a little bit.


Look for Updates and select it and a side window will open and click on Update Now.


It will take an  hour to update all the new features and then you can open the model driven app and see new changes as released features in this wave release.


That's it for today.


I hope this helps


Malla Reddy Gurram(@UK365GUY)
#365BlogPostsin365Days