Monday 31 July 2023

XRMTOOLBOX SQL 4 CDS to get logged in users, Users with security roles in Dynamics 365

Hello Everyone,


Today i am going to show the XRMTOOLBOX tool SQL 4 CDS which allows you to use standard SQL  syntax to query and manipulate your data and metadata in Dataverse and Dynamics 365.


Let's gets started.


Here is the link for sql 4 cds 


SQL 4 CDS tool Capabilities:


First of all many thanks to creator of this tool Mark Carrington.


As per the release notes:


Add support for XML data type and FOR XML clause.

Add support for Elastic tables

Add support for Stuff function

Add option to bypass plugins for SELECT statements

Improved error reporting for duplicated table/alias names

Improved error reporting for plugin errors

Improved efficiency of joins that can't be translated to FetchXML

Improved error handling during bulk DML Operations

Fixed querying audit table

Fixed Collation label for metadata and virtual columns

Fixed hash joins on different collations

Fixed filtering on outer-joined solution table

Fixed multi threading error with partitioned aggregations

Fixed copying results with headers but no data rows. 


I have used this tool for find out the users with role, below is the script:

SELECT identityid,
       systemuser.internalemailaddress,
       systemuser.fullname,
       systemuser.title,
       systemuser.systemuserid,
       systemuser.isdisabled,
       systemuser.islicensed,
       account.name,
       businessunit.name,
       role.roleid,
       businessunit.name,
       role.name
FROM   systemuserroles
       INNER JOIN
       systemuser AS systemuser
       ON systemuser.systemuserid = systemuserroles.systemuserid
          AND (systemuser.isdisabled = 0
               AND systemuser.accessmode = 0)
       LEFT OUTER JOIN
       account AS account
       ON account.accountid = systemuser.gmr_opcoid
       INNER JOIN
       businessunit AS businessunit
       ON businessunit.businessunitid = systemuser.businessunitid
       INNER JOIN
       role AS role
       ON role.roleid = systemuserroles.roleid
          AND (role.name = ' Admin All'
            OR role.name = ' Admin Owned'
            OR role.name = ' Admin Project'
            OR role.name = ' Analytics'
            OR role.name = ' Basic '
            OR role.name = ' Basic Client'
            OR role.name = ' BI Integration'
            OR role.name = '  Embedded Power BI Report'
            OR role.name = ' Embedded Reports OC'
            OR role.name = ' Financial Controller'
            OR role.name = ' Import/Export'
            OR role.name = 'Integration'
            OR role.name = ' Admin'
            OR role.name = ' Manager'
            OR role.name = ' Integration'
            OR role.name = ' Service Account');


Also for last logged in users:


SELECT   a.actionname,
         a.objectid AS systemuserid,
         s.fullname,
         s.domainname,
       (SELECT   TOP 1 c.createdon
          FROM     audit AS c
                   INNER JOIN
                   systemuser AS systemuser
                   ON systemuser.systemuserid = c.objectid
                      AND c.action = 64
                      AND c.createdon >= dateadd(month, -6, GETDATE())
          WHERE    c.objectid = a.objectid
          ORDER BY c.createdon DESC) AS lastloginutc
FROM     audit AS a
         JOIN
         systemuser AS s
         ON a.objectid = s.systemuserid
            AND a.action = 64
            AND a.createdon >= dateadd(month, -6, GETDATE())
         RIGHT OUTER JOIN
         systemuserroles AS systemuserroles
         ON systemuserroles.systemuserid = s.systemuserid
         RIGHT OUTER JOIN
         role AS role
         ON role.roleid = systemuserroles.roleid
            AND role.name LIKE 'GMR SEC%'
GROUP BY a.actionname, a.objectid, s.fullname, s.domainname, s.internalemailaddress
ORDER BY lastloginutc DESC;


That's it for today


I hope this helps.
Malla Reddy(@UK365GUY)
#365BlogPostsin365Days

Sunday 30 July 2023

Browser level settings for auto save on Canvas App Power Apps

Hello Everyone,


Today i am going to show how to enable browser level settings for Auto Save of the changes made on Canvas App.


Let's get's started.


Suppose you want to save the changes you have made on your Canvas App automatically, you can do that from canvas app settings.


How do you do that ?


Open Canvas App and edit.


Once the Canvas App is opened then open settings.


Auto Save: Save changes every 2 minutes. This is a browser level settings = ON.


That's it for today.


I hope this helps.
Malla Reddy(@UK365GUY)
#365BlogPostsin365Days


Saturday 29 July 2023

{Resolved} Datetime is less than minumum value supported by CrmDateTime


Hello Everyone,


Today I am going to show how to resolve error message Datetime is less than minumum value supported by CrmDateTime.


Let's gets started.


Suppose you are working on the Opportunity and trying to save the record, then the following error message will be displayed.


DateTime is less than minumum value supported by CrmDateTime. Actual value: 01/01/0001 00:00:00, Minimum value supported: 01/01/1753 00:00:00


The error message is complaining about the date field which is having the decimal values in it.


Solution:


Replace the value with the date and save the record.


Then the error message will go away.


That's it for today.

I hope this helps
Malla Reddy(@UK365GUY)
#365BlogPostsin365Days

Friday 28 July 2023

{How to} enable access to microsoft dataverse actions on Power Apps Maker Studio

Hello Everyone,


Today i am going to show to enable Microsoft Dataverse actions in Power Apps Studio. This is related to upcoming features on Power Apps.


Let's get's started.


If you are trying to  turning on upcoming features on power apps studio 'Smart email validation' then the following error will be displayed.


Then all you need to do is to enable access to Microsoft Dataverse Actions on Power Apps Studio.


Go to the Preview tab as this feature in in PREVIEW at the moment and turn on the Microsoft Dataverse Actions.


What is the purpose of this feature is to use Power Fx expressions to access to Microsoft Dataverse Actions.


Thats it for today.

I hope this helps
Malla Reddy(@UK365GUY)
#365BlogPostsin365Days

Thursday 27 July 2023

{Did you know} you can have a job in 3 months with Power Up Program

Hello Everyone,


This blog posts for career switchers and freshers starting job now, can join the Power Up Program run by Microsoft.


Lets gets started.


Are you looking for career change or fresher searching for job now then continue reading this blog post.


Microsoft runs Power Up Program to train you to become a Microsoft Power Platform Consultant in all aspects starting from what to learn and assignments and interview preparations.


So why dont you take a look at Microsoft Power Up Program and join and empower yourself and community around you.


Here is the link to Microsoft Power Up Program


You will get trained on Power Apps, Power Automate, Power BI, Power Virtual Agent, and then you can learn how to analyze data,build solutions, automate processes and create intelligent chatbots.


I hope this blog post can help someone out there in the world and if this blog post is useful and you can also help someone in whatever way you can.. 


That's it for today.

I hope this helps
Malla Reddy(@UK365GUY)
#365BlogPostsin365Days

Wednesday 26 July 2023

{Did you know} how it looks when enable relationship insights in Dynamics 365 Sales Insights

Hello Everyone,


Today i am going to show how it looks when relationship insights enabled on Dynamics 365 Sales Insights.


Let's get's started.


Login into Dynamics 365 Sales Insights.


If you want to know how to enable Dynamics 365 Sales Insights click


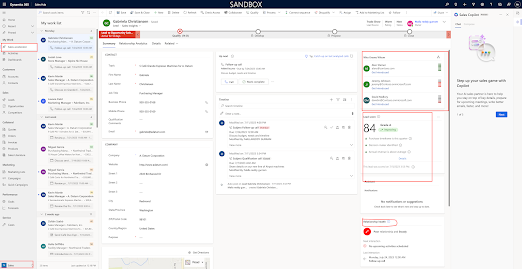
Then if you switch to Sales and open the sales accelarator then you will see the sales insights see below screenshot.


That's it for today.

I hope this helps

Malla Reddy(@UK365GUY)
#365BlogPostsin365Days

Tuesday 25 July 2023

{Do you know} Dynamics 365 and Microsoft Power Platform release planner documentation

Hello Everyone,


Today i am going to share Dynamics 365 and Microsoft Power Platform release planner documentation site.


Let's get's started.


Microsoft Dynamics 365 and Power Platform Community usually look for release documentation area on search engines.


I am going to share the url here


That's it for today.


I hope this helps.

Malla Reddy(@UK365GUY)
#365BlogPostsin365Days

Monday 24 July 2023

How to approve email addresses for Users or Queues privilege by normal user other than system administrators in Dynamics 365 Sales

Hello Everyone,


Today i am going to show to approve email addresses by normal user other than system administrator.


Let's get's started.


Normally to approve an email addresses in Dynamics 365 user requries the Approve Email Addresses for Users or Queues Privileges.

System Administrators usually have this role assigned default, so if any other user requires to approve email addresses, system admin's can assign this  Approve Email Addresses for Users or Queues Privileges to their security role.


How to assign manually lets see in action:


Login into Power Platform Admin Center and select an environment,


In the legacy web client in the upper right hand corner, click on Advanced Settings.


Settings > Users + Permissions > Security roles.


Security role and then select the Business Management tab.

Under Miscellaneous Privileges, set the previleges level for Approve Email Addresses for Users or Queues.


Then Approve Mailboxes:


How do you do that?

Login into Power Platform Admin Center, select the environment,

Legacy web client click on advanced settings.

Select Settings > Email > Mailboxes.

Select Active Mailboxes.

Select the mailboxes that you want to approve and then select More commands  > Approve Email.

Select OK.


That's it for today.

I hope this helps
Malla Reddy(@UK365GUY)
#365BlogPostsin365Days


Sunday 23 July 2023

{How to } enable and open Customer Service admin center on Dynamics 365 Customer Service Hub

Hello Everyone,


Today i am going to share how to enable and open new customer service admin center from Dynamics 365 Customer Service App.


Let's get's started.


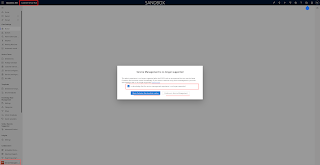
Normally we used to go to service management section on Dynamics 365 Customer Service from settings and the service management to maintain the SLA's for customer service for any kind of business. but from April 2023 no longer the admin experience available. so Microsoft recommends that you use the latest Customer Service admin center's immediately. if you want to continue using Service Management, you must acknowledge that it's no longer supported.


Once acknowledge is completed you can go for either Open Customer Service admin center or Continue in Service Management


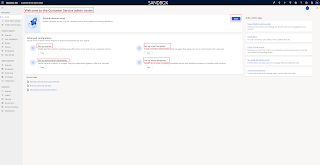
In this case i have chosen the Open Customer Service Admin Center and new window will be displayed see below.


Guided channel setup:

You can configure the define the channel setup for customer service using queues and routing definitions. BEGIN.


Advanced configuration:

1. Set up macros: Which enable agents to perform repetitive tasks efficiently in a fast and process-complaint manner.

2.Set up service- level agreements:  Define the level of service or support that your organisation agrees to offer to a customer.


3. Set up email templates: Create consistent, preformatted email messages that agents can use to communicate with customers.


4. Set up article templates: Simplify the process of creating knowledge articles and maintain consistency in branding and structure.


That's it for today.

I hope this helps
Malla Reddy(@UK365GUY)
#365BlogPostsin365Days

Saturday 22 July 2023

[How to} enable relationship insights in Dynamics 365 sales insights

Hello Everyone,


Today i am going to share how to enable relationship insights in dynamics 365 sales insights.


Let's get's started.


What is relationship insights?


Relationship Intelligence helps sellers use the information in Dynamics 365 and Microsoft  365 to identify, build, and nurture relationships with their customers.


Relationship Intelligence = ENABLE.


Enable for all security roles, specific security roles.


Relationship Analytics:


Relationship analytics monitors customer relationships with health score and detailed analytics about interactions, patterns and trends based on interaction data from Dynamics 365 and Outlook.

Enabled.


Who Knows Whom:


Who knows whom helps sellers quickly identify colleagues within the organisation who can introduce them to lead or contract = Enabled.


Finally Save.


Relationship analytics and health:


Relationshio health : Rating and trends appear on sales insights opportunity record forns, list views and charts. ENABLED.


Activity influence:


You can adjust the relative importance of different activity types in determing relationship health. Provide a value between 3 and 9.


English: 6
Meetings 6
Phone calls 6
Tasks 6


Communication Frequency:


How often do you plan to communicate with your customers : Every day, a few times a week, Once a week, a few times a month, Once a month.


Health score grading:

Tell us the grading you want for the health score. when you input the range, you will see an estimate of the percentage of records that would fall under each category. Any changes you make can take up to 24 hours to be reflected in the health classification.


1. Good: calculating estimates can take up to 24 hours: 100 to 75

2. Fair: Calculating estimates can take up to 24 hours. 59 to 45

3. Poor: Calculating estimates can take up to 24 hours. 39 to 0


Who Knows Whom:

To use who knows whom in Dynamics 365, ensure that connection graph in Office 365 Admin Center is enabled,


Select an email template from the below to use for sending introduction emails to connections.

1. Who knows whom introduction.
2. Marketing communication unsubscribe acknowledge
3.New Product Launch.
4. Who Knows whom Introduction.


Then save.


That's it for today.

I hope this helps
Malla Reddy(@UK365GUY)
#365BlogPostsin365Days


Friday 21 July 2023

{Resolved} The selected workflow has errors and cannot be published. Please open the workflow, remove the errors and try again.

Hello Everyone,


Today I am going to share how to resolve the error: "The selected workflow has errors and cannot be published. Please open the workflow, remove the errors and try again."


Let's gets started.


I got this error message while importing the solution into UAT from Dev as unmanaged.its because of the workflows has error messages.


"The selected workflow has errors and cannot be published. Please open the workflow, remove the errors and try again"


What is the error complaining all about?


Solution: First make the workflows as draft state and publish all customizations and then  start importing the solution into the UAT and after successful import, then open the solution and edit the workflows as below:


It is complaining about the workflow that has been manually selected users for email notifications users, business units and regions in my case.


So  i have removed the users for the email notifications and reselected the same users, business units and regions.


Then i have activated the workflow.


It works for me.


That's all for today.

I hope this helps
Malla Reddy(@UK365GUY)
#365BlogPostsin365Days 

Thursday 20 July 2023

{How to} enable Productivity Settings on Dynamics 365 Sales Insights

Hello Everyone,


Today i am going to show how to enable productivity settings and what are the useful setting that will get from Dynamics 365 Sales.


Let's get's started.


Login into Dynamics 365 Sales App.


Conversation Intelligence:

Which enables your sales team to access powerful call insights and analysis, drill down into their customer interactions and get real time call transcripts and summaries.


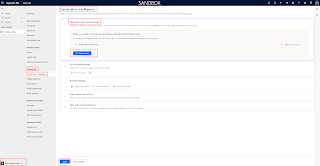
Microsoft Teams Call Recording: Enable your sellers to make call recordings with Microsoft Teams calls, which will be used by conversation intelligence to provide insights and analysis for those calls.


Click on Enable Teams calls - setup


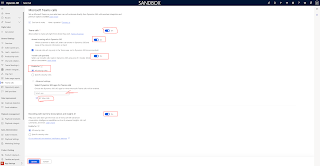
Teams calls : ON,

Allow sellers to make calls right from where they work.


Answer incoming calls in Dynamics 365 = ON

When customers or leads call, sellers can answer in Dynamics 365 and keep all the relevant information at hand.


Check the box: Internal calls will ring only in the Teams app, not in Dynamics 365 (recommended)


Transfer calls (Preview) = ON

Sellers can transfer calls made in Dynamics 365 using one of 3 modes: blind, safe or consultative


Enable for:

1. All Security roles
2. Specific security roles


Advanced settings:

Select Dynamics 365 apps for Teams calls: Search for Sales Hub.


Recording with real-time transcription and insights = ON


Enable for:

1. All security roles
2. Specific security roles.


Click on UPDATE.


Call recording storage: which define call recording storage location and retention.


Storage for call recording: Select the storage where call recordings are saved.

Retention policy: choose the amount of time that call recording data is stored.


1. Microsoft provided storage
2. Your own Azure storage


Retention Policy: 30 day retention policy, 90 day retention policy.


Similarly Business settings:

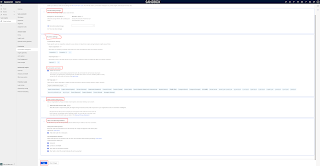
Conversation tracking:

competition, competitor


Track keywords:

add specific keyword or phrases to your solution or industry to track and analyze by seller and customer mentions.


Automated summaries:

Enable call summary: Call summaries are automatically generated for each and  include the call trancript, key topics discussed by call participants, tracked keywords, possible action items and more enabkling sellers to easily review the call, and create and revise notes.


My Languages: you can select the language to enable accurate transcription, keyword tracking, analysis, insights and KPI's.


Data Consent and privacy:


Check the box to read only access to data.


New and upcoming features:

You can check the features before they're rolled out to all your customers.

1. Hide credit card info in trancripts.


Call categorization(preview)
1. Voicemail
2. Contact is unavailable
3. Short calls with reschedule requests
4. Short calls in which the contact indicates the call is unwanted.


That's it for today

I hope this helps
Malla Reddy(@UK365GUY)
#365BlogPostsin365Days

Wednesday 19 July 2023

{How to } download active users and active users by security role from Power Platform Admin Center

Hello Everyone,


Today i am going to share how to check most active users and active users by security role from power platform admin center.


Let's get's started.


Suppose you have a requirment to check most active users and active users by security role in your environment(Dataverse).


How do you check that ?


Expand the analytics and click on the dataverse.


In the drop down views: You can see the active users by device type, active users by business unit, by security role, by client, by entities, performing operations, custom entities, OOB entities, Most active workflows, plugins, used API.

Active Dynamics 365 Customer Engagement Plan Users by Application,

Non-conformant usage by users with Team Members License.

For more information click here


Thats it for today.

I hope this helps
Malla Reddy(@UK365GUY)
#365BlogPostsin365Days

Tuesday 18 July 2023

{How to } show Dynamics 365 Data in Teams meetings

Hello Everyone,


Today I am going to show how to show dynamics 365 data in teams meetings.


Let's get's started.


Login into Dynamics 365 Sales App.


Click on App Settings.


Show Dynamics 365 data in Teams meetings(preview)


Suppose when a meeting is connected to a Dynamics 365 record, automatically show record details in Teams when the meeting start. Only people in your org will see the record data in teams. 

Turn on this settings to YES.


Note: In order to make this settings work, turn on this server side sync settings too.


Synchronation of Calendars:

Teams meetings created in Dynamics 365 will show up on the calendars in Teams and Outlook.


To create meetings from Dynamics 365, turn on this settings:

Add and join meetings:


Lets people create and join Teams meetings directly from Dynamics 365. Go to Power Platform Admin Center, Open the environment.

Navigate to Settings > Products > Features  and turn on End users can add and join Teams meetings from appointments in model driven apps.


Finally Save.


That's it for today.

I hope this helps
Malla Reddy(@UK365GUY)
#365BlogPostsin365Days

Monday 17 July 2023

{How to} enable Microsoft Teams Collaboration and chat from Dynamics 365 Sales App

Hello Everyone,


Today I am going to show how to enable microsoft teams collaboration and chat from Dynamics 365 Sales App.


Let's get's started.


Login into Dynamics 365 Sales App.


Change the settings to "APP SETTINGS".


Click on the "Chat and collaboration"


Microsoft Teams collaboration and chat - seamlessly collaborate with Dynamics 365 Teams members.


Some of the settings here you need to enable, lets see what they are ?


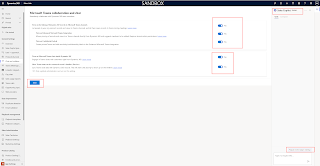
Turn on the linking of Dynamics 365 records to Microsoft Teams channels - Lets people in your org connect records and views to Teams channels, and let them open records in teams during meetings.


Turn on Enhanced Microsoft Teams Integration - Allows pinning of records and views to a teams channel directly from Dynamics 365 and suggests members to be added. Requires tenant admin permissions. When this settings turned on - tenant admin show approve or allow for this integration.


Turn on Confidential Labels - Create private Teams and add sensitivity/confidentiality labels in the Enhanced Microsoft Teams Integration.


Turn on Microsoft Teams chats inside Dynamics 365 - Engage in Teams chats with coworkers right from Dynamics 365 = ON.


Show Teams chats on the connected records timeline(Preview). - Sync Teams chat data with Dynamics 365 records. This will allow chat activity to show up on the timeline.


Note: Only a global administrator can turn on this settings.


Finally SAVE.


You can also enable Sales Copilot (preview) which allows to you to prepare for the upcoming meetings, just type in the questions you will get response appropriately if sales copilot is enabled on this Sales App.


Final settings will be like this below screenshot.


That's it for today.

I hope this helps.
Malla Reddy(@UK365GUY)
#365BlogPostsin365Days


Sunday 16 July 2023

{How to } enable Sales Copilot settings in Dynamics 365 Sales App

Hello Everyone,


Today i am going to share how to enable Sales Copilot Settings which is in Preview at the moment.


Lets gets started.


What is Sales Copilot ?


Sales Copilot uses generative AI Technology and info from Dynamics 365 to help sellers in their sales journey.


Login into Dynamics 365 Sales Hub App.


Change the settings to "App Settings"


Then Click on the Set up Sales Copilot, new settings will appear on the right hand side and check the sales hub  Compose and Chat check boxes to yes.

Finally click CONFIRM.


New Screen will be displayed with:


Record Summary: Help sellers stay on top with concise AI- assisted summaries of a record. The first 7 fields of the selected view will be used to create the summary.


Choosing a view shows the fields that'll be in the summary.


So for example: 


Lead  - default system view and upto 6 fields available in the view.


Similarly Opportunities also you can est revenue, sales stage, customer needs for Proposed Solution, Account, Contact.


Reccord Catch up: 


Help sellers stay on top of all major changes that happened while they are away.   The first 10 fields of the selected view will be used to create the catch up, Choosing a view shows that'll be in the catch up.


Turn audit on = ON.


Catch up will only work if the AUDIT's is ON.   That allows Sales Copilot to summarize activities since a seller last logged in or provide updates on changes made in the past 7 days.

Save changes made.


Compose:  


Help sellers write better emails and stay on top of their deals with AI -driven insights based on their communication with sales contacts and info from Dynamics 365.


Thats it for today.

I hope this helps.
Malla Reddy(@UK365GUY)
#365BlogPostsin365Days

Saturday 15 July 2023

{How to} enable Optimizing Ranks in Dynamics 365 Sales for Insight cards

Hello Everyone,


Today i am going to share how to enable Optimizing ranks in Dynamics 365 Sales for insights cards to show on the form.


Let's gets started.


What is Optimize Ranking:  Optimizing ranking option in Assistant allows you to optimize the ranking of cards that are important and promotes those cards to display at the top.


You can define rules up to 4 rules in the ranking section, based on tables such as Account, Leads, and Opportunity.


Note: Cards are given priority based on the order you define in the settings.


Login into Dynamics 365 Sales.


Go to "sales insights settings" see below screenshot.


Configure the conditions that should apply to the insight cards to show related data at the top of the cards.


Finally save the changes and ranking rules have been created, processed and applied to the cards in your organization.


Note: If you dont see these settings in your app means

1. You don't have necessary license or role.

2. Your administrator hasn't turned on the feature.

3. Your organisation using custom model driven app, so you need to check with system administrator about the sales hub or sales professional app.


That't it for today.

I hope this helps
Malla Reddy(@UK365GUY)
#365BlogPostsin365Days

Friday 14 July 2023

{How to } Create Insight Cards in Dynamics 365 Sales

Hello Everyone,


Today i am going to share how to create Insight Cards in Dynamics 365 Sales.


Let's gets started.


Login into Dynamics 365 Sales and change the settings to "Sales Insights Settings".


Click on Insights Cards underneath the Assistant Studio.


What is the purpose of the sales insight cards ?


To manage, customize and create new insights cards for your team.


License and Security role:

License: Dynamics 365 Sales Premium 

Security role: System Adminstrator or Sales Manager.


Note: Microsoft Power Automate is installed if you want to create custom insights cards with the assistant studio.


Custom Insight Card is installed in the list of insights cards in Assistant Studio only after a card is generated based on the defined flow.


For example: You defined a flow to display a card when an Opportuntiy is created with an estimated value above £5000. When an Opportunity is created for the for the first time in the organisation with the estimated value of £6000, the card is generated and will be available in the list of insight cards in Assistant Studio.


When you click on the create insight cards then new screen will be displayed with a Status = Installation Complete.

Dynamics 365 Sales Insights can be used for the following:

1. Relationship Analytics: Prioritize customers with health score based on artificial intelligence that reveals relationship health, risk, and next best action.


2. Predictive Lead Scoring: Increase conversions and win rates by finding and prioritizing prospects with the highest likelihood to buy based on predictive intelligence.

3. Predictive Opportunity Scoring: Focus on the best opportunities to increase win rates by identifying and prioritizing sales opportunities with the highest likelihood to close through predictive intelligence.


4. Connection Insights: Find collegaues who can introduce you to contacts and leads, Stay on top of personable talking points from past email correspondences.


Then you can start creating Insight Cards.


That's it for today.

I hope this helps.
Malla Reddy(@UK365GUY)
#365BlogPostsin365Days


Thursday 13 July 2023

How to set up Sales accelerator workspace in Dynamics 365 Sales.

Hello Everyone,


Today i am going to share how to set up sales accelerators in Dynamics 365 Sales.


Let's get's started.


Login into  Dynamics 365 Sales 


What is the purpose of the sales accelerator ?


Sales Accelerator empower your sellers to effectively engage with customers using sales accelerator.

Sellers can already use the workspace for manual activities.


Recommendation to set up sales accelerator workspace to:


Manage permissions: Control who gets access to the workspace by choosing desired security roles.

Use sequences: Create timed sequences of activities to guide sellers on how to best approach their customers.

Customize workspace:  Create filters, choose which record types should populate sellers work lists, and do more customizations.


Change the settings to "Sales Insights Settings" on the left bottom cornor. 


Click on the Workspace under the Sales accelerator.


Click on the Quick setup and you will get the window on the right hand side of the screen and enable for "all security roles".

You can also select the record type and form then click on Publish.


Sales accelerator workspace enabled.


You can manage access and record type but we already selected all security roles so just ignore it in this example.


customize workspace like filtering and sorting, work item appearance as you can see below screenshot.


Recommended next steps:

Create a sequence :


Assignment rules: Create rules that automatically assign leads and opportunities to the right sellers and teams.


Sequence reporting: Sales accelerator reports includes: 


1. Seller availability : Allow sellers to set their availability so sequence steps will become relevant only when assigned sellers are available.

2. Sequence activties : Choose whether you want to pre-create linked activities in sellers timeline for upcoming sequence steps. if pre-create is off, linked activity is created on click of sequence step action.


3.Sequence reporting: 

4.Phone number priority


After the sequence settings configured click save.


Finally the sales accelerator looks like below screenshot


That's it for today.


I hope this helps.

Malla Reddy(@UK365GUY)
#365BlogPostsin365Days